
这篇文章和下一篇文章笔记将会结合源码,具体调试和跟踪一个HTTP请求的处理过程。
本系列的源码工程为:HowTomcatWorksSourceCode。
这两篇文章会串联本系列之前的所有的文章,从客户端连接开始一直到Servlet的处理方法。相信有之前文章的基础,追踪HTTP请求的处理过程会比较简单的。
本文目录为:
1.入口
获取/接受客户端连接Socket自然是ServerSocketChannel#accept()方法。
NioEndpoint的init方法内的bind方法有这部分代码:
else {
            serverSock = ServerSocketChannel.open();
            socketProperties.setProperties(serverSock.socket());
            InetSocketAddress addr = new InetSocketAddress(getAddress(), getPortWithOffset());
            serverSock.bind(addr, getAcceptCount());
        }
        serverSock.configureBlocking(true); //mimic APR behavior
这里打开ServerSocketChannel,然后由Acceptor线程一直调用ServerSocketChannel#accept()方法接受客户端连接。
所以追踪Http请求处理过程的入口自然是Acceptor的run方法内部,调用serverSocketAccept方法的这行代码。
socket = endpoint.serverSocketAccept();
2.端点
2.1 Acceptor
我们首先进入Acceptor的run方法. 其serverSocketAccept如下:
 @Override
    protected SocketChannel serverSocketAccept() throws Exception {
        SocketChannel result = serverSock.accept();

        // Bug does not affect Windows platform and Unix Domain Socket. Skip the check.
        if (!JrePlatform.IS_WINDOWS && getUnixDomainSocketPath() == null) {
            SocketAddress currentRemoteAddress = result.getRemoteAddress();
            long currentNanoTime = System.nanoTime();
            if (currentRemoteAddress.equals(previousAcceptedSocketRemoteAddress) &&
                    currentNanoTime - previousAcceptedSocketNanoTime < 1000) {
                throw new IOException(sm.getString("endpoint.err.duplicateAccept"));
            }
            previousAcceptedSocketRemoteAddress = currentRemoteAddress;
            previousAcceptedSocketNanoTime = currentNanoTime;
        }

        return result;
    }
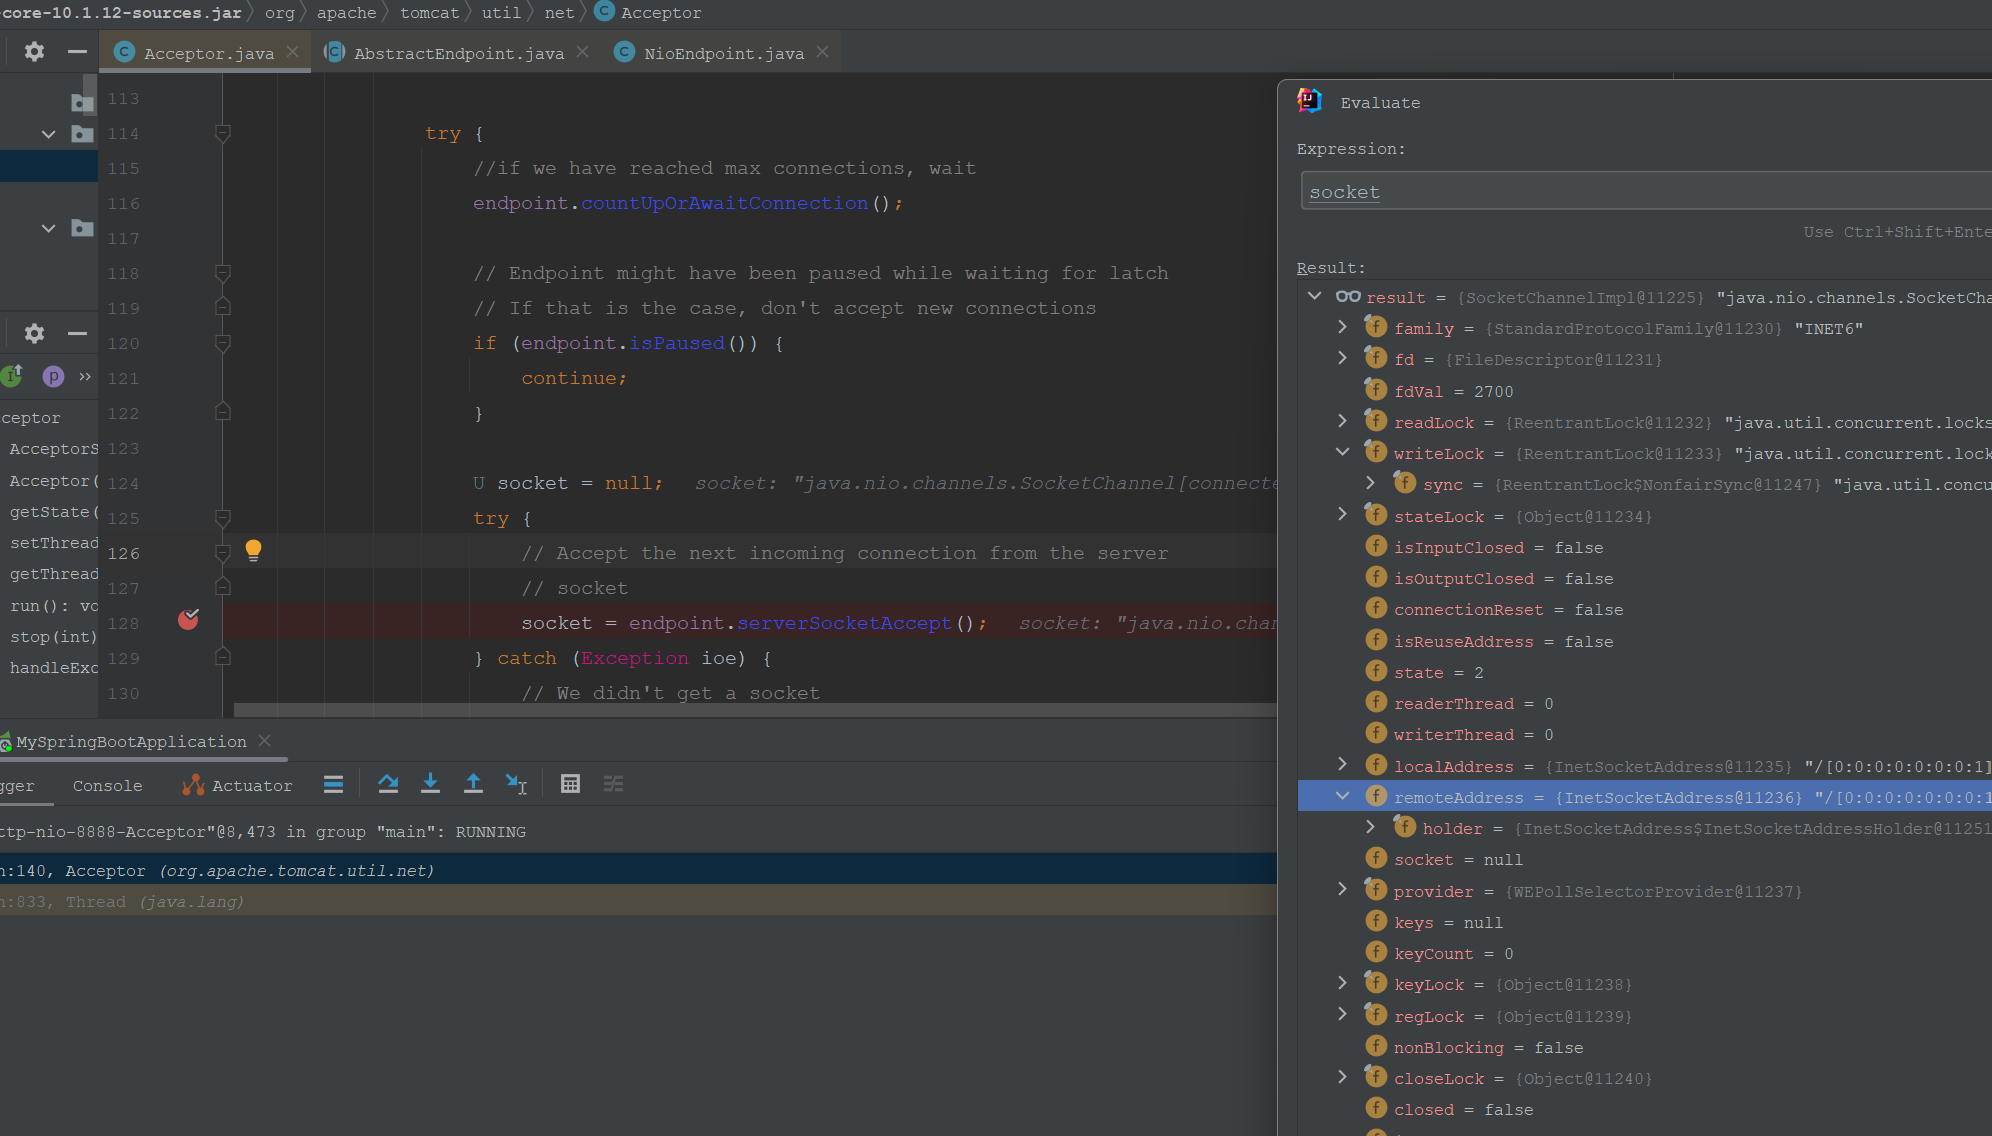
调试监听的客户端Socket如下:
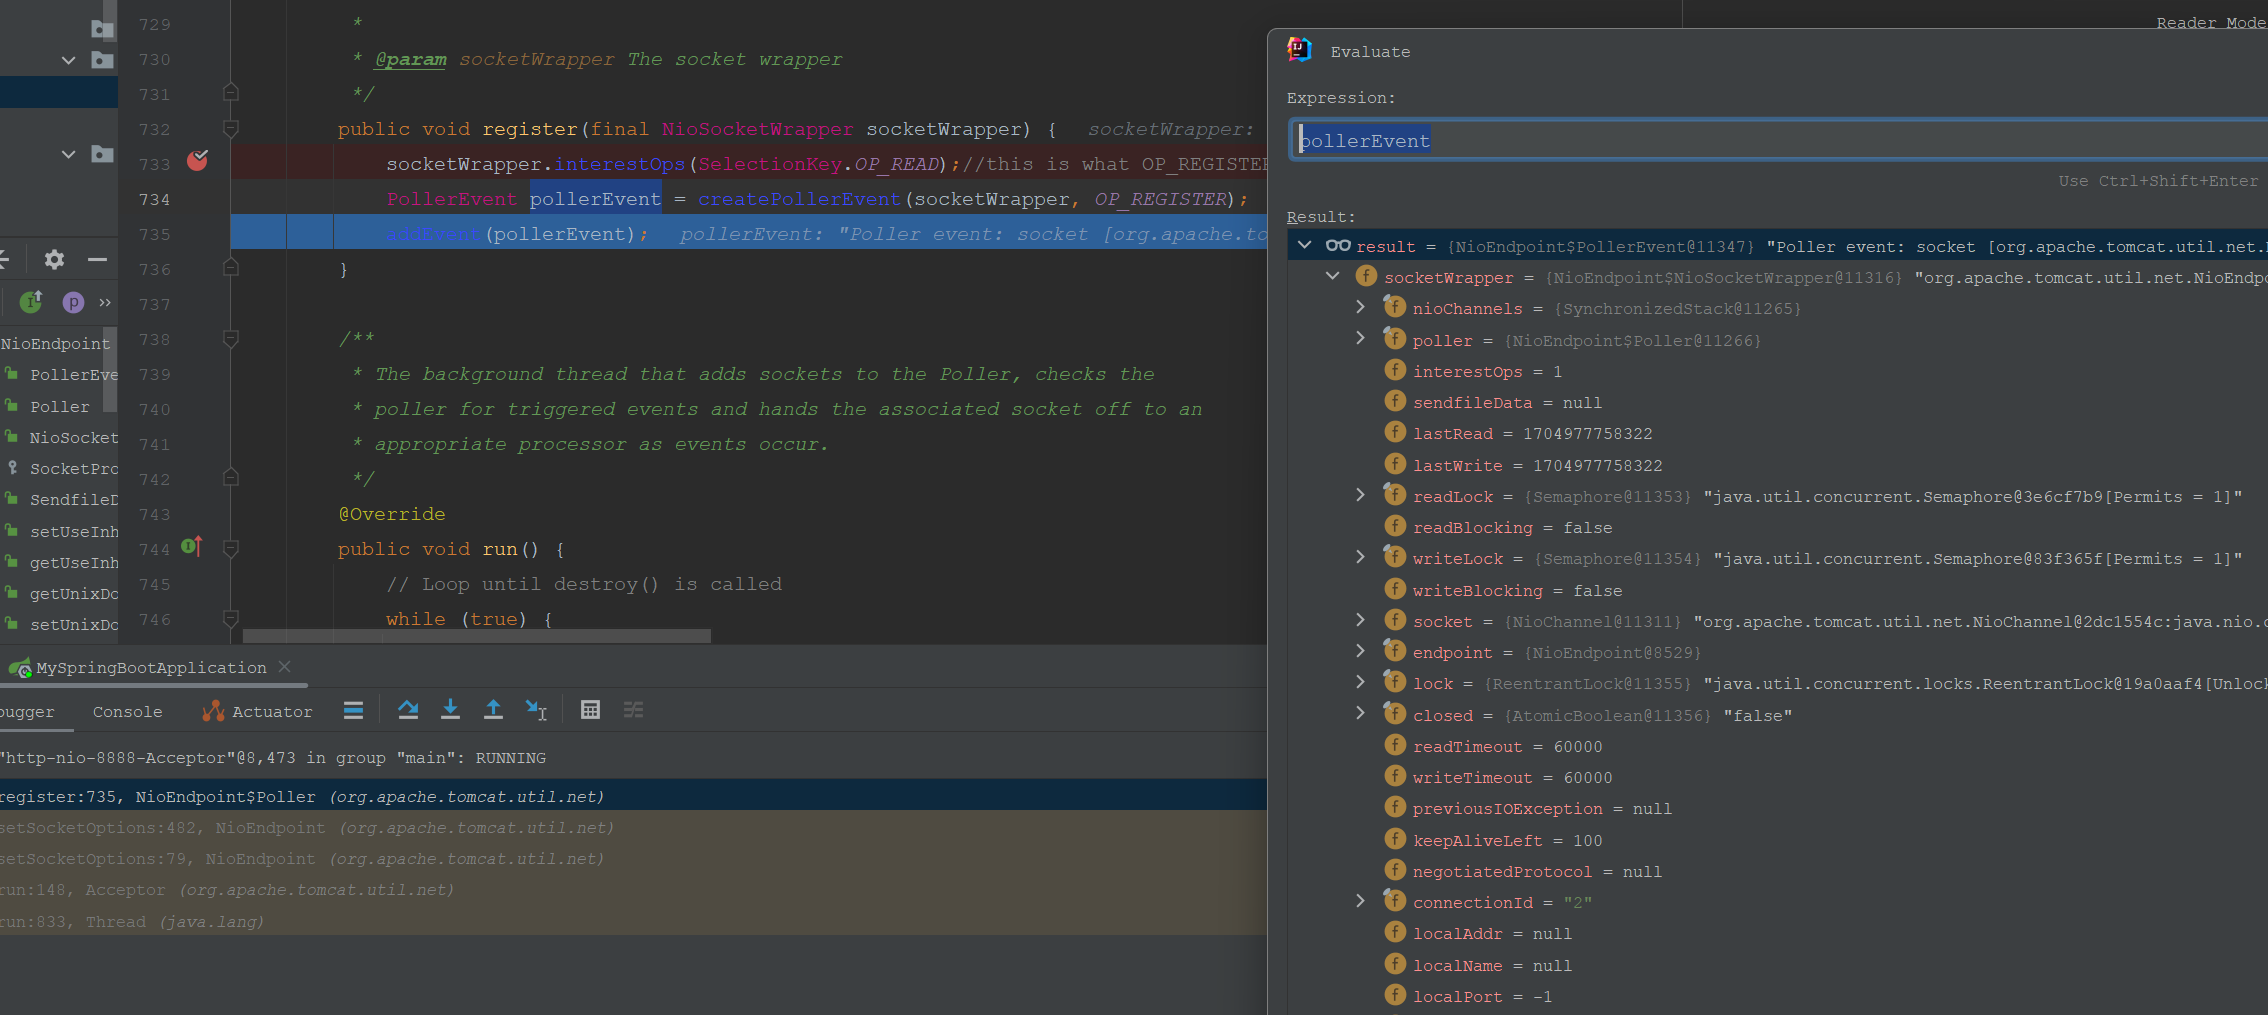
最后向events事件队列注册的事件pollerEvent如下:
这样Acceptor对一次accept获取的socket便处理完成。下面来到Poller对Event(Socket)的处理流程。
2.2 Poller
Poller最核心的方法也是run方法。
在events()方法内弹出事件,并注册SelectionKey:
sc.register(getSelector(), SelectionKey.OP_READ, socketWrapper);
然后处理单个SelectionKey:
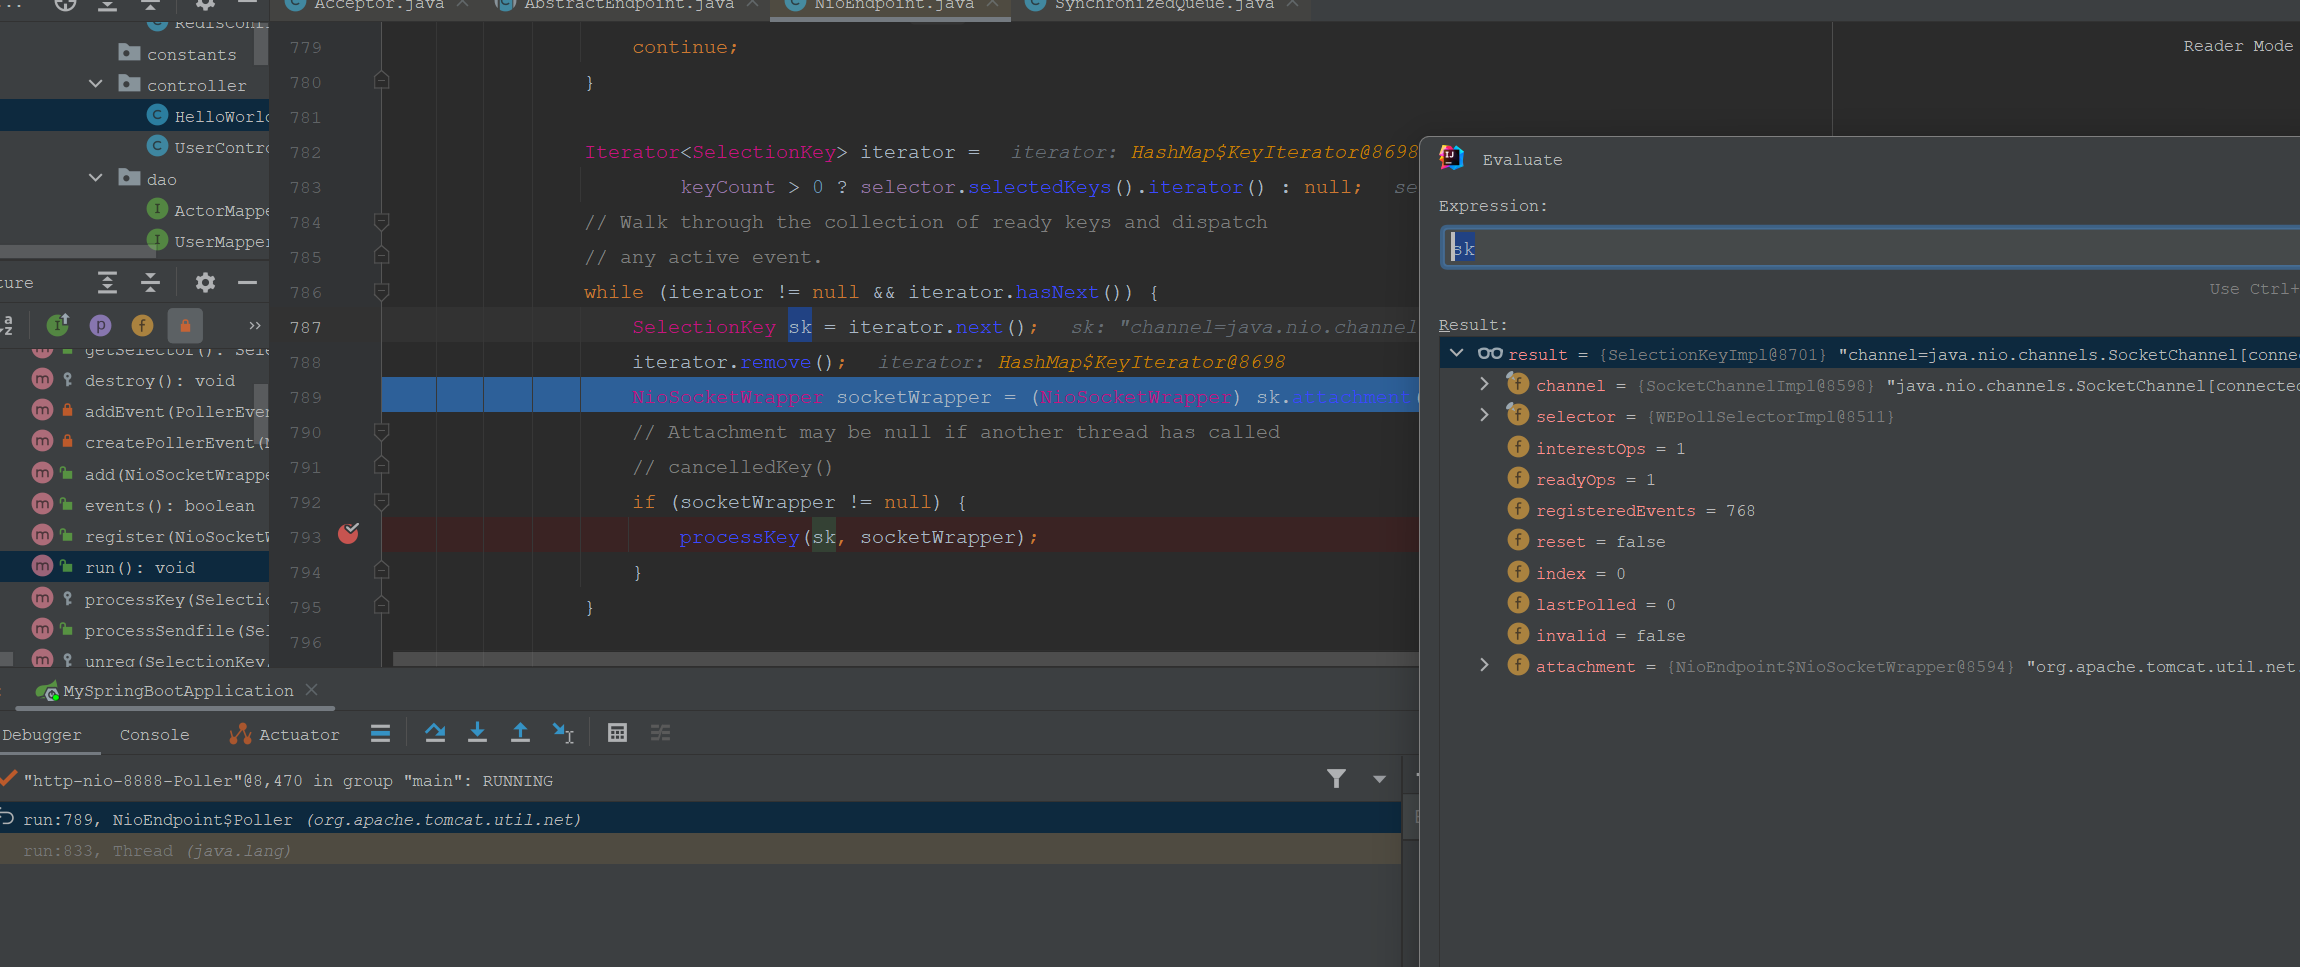
我们继续进入processKey方法:
else if (!processSocket(socketWrapper, SocketEvent.OPEN_READ, true)) {
                                    closeSocket = true;
                                }
接着进入processSocket这个处理socket和event的方法:
public boolean processSocket(SocketWrapperBase<S> socketWrapper,
            SocketEvent event, boolean dispatch) {
        try {
            if (socketWrapper == null) {
                return false;
            }
            SocketProcessorBase<S> sc = null;
            if (processorCache != null) {
                sc = processorCache.pop();
            }
            if (sc == null) {
                sc = createSocketProcessor(socketWrapper, event);
            } else {
                sc.reset(socketWrapper, event);
            }
            Executor executor = getExecutor();
            if (dispatch && executor != null) {
                executor.execute(sc);
            } else {
                sc.run();
            }
        } catch (RejectedExecutionException ree) {
            getLog().warn(sm.getString("endpoint.executor.fail", socketWrapper) , ree);
            return false;
        } catch (Throwable t) {
            ExceptionUtils.handleThrowable(t);
            // This means we got an OOM or similar creating a thread, or that
            // the pool and its queue are full
            getLog().error(sm.getString("endpoint.process.fail"), t);
            return false;
        }
        return true;
    }
这里能看到业务线程池的具体信息,如下:
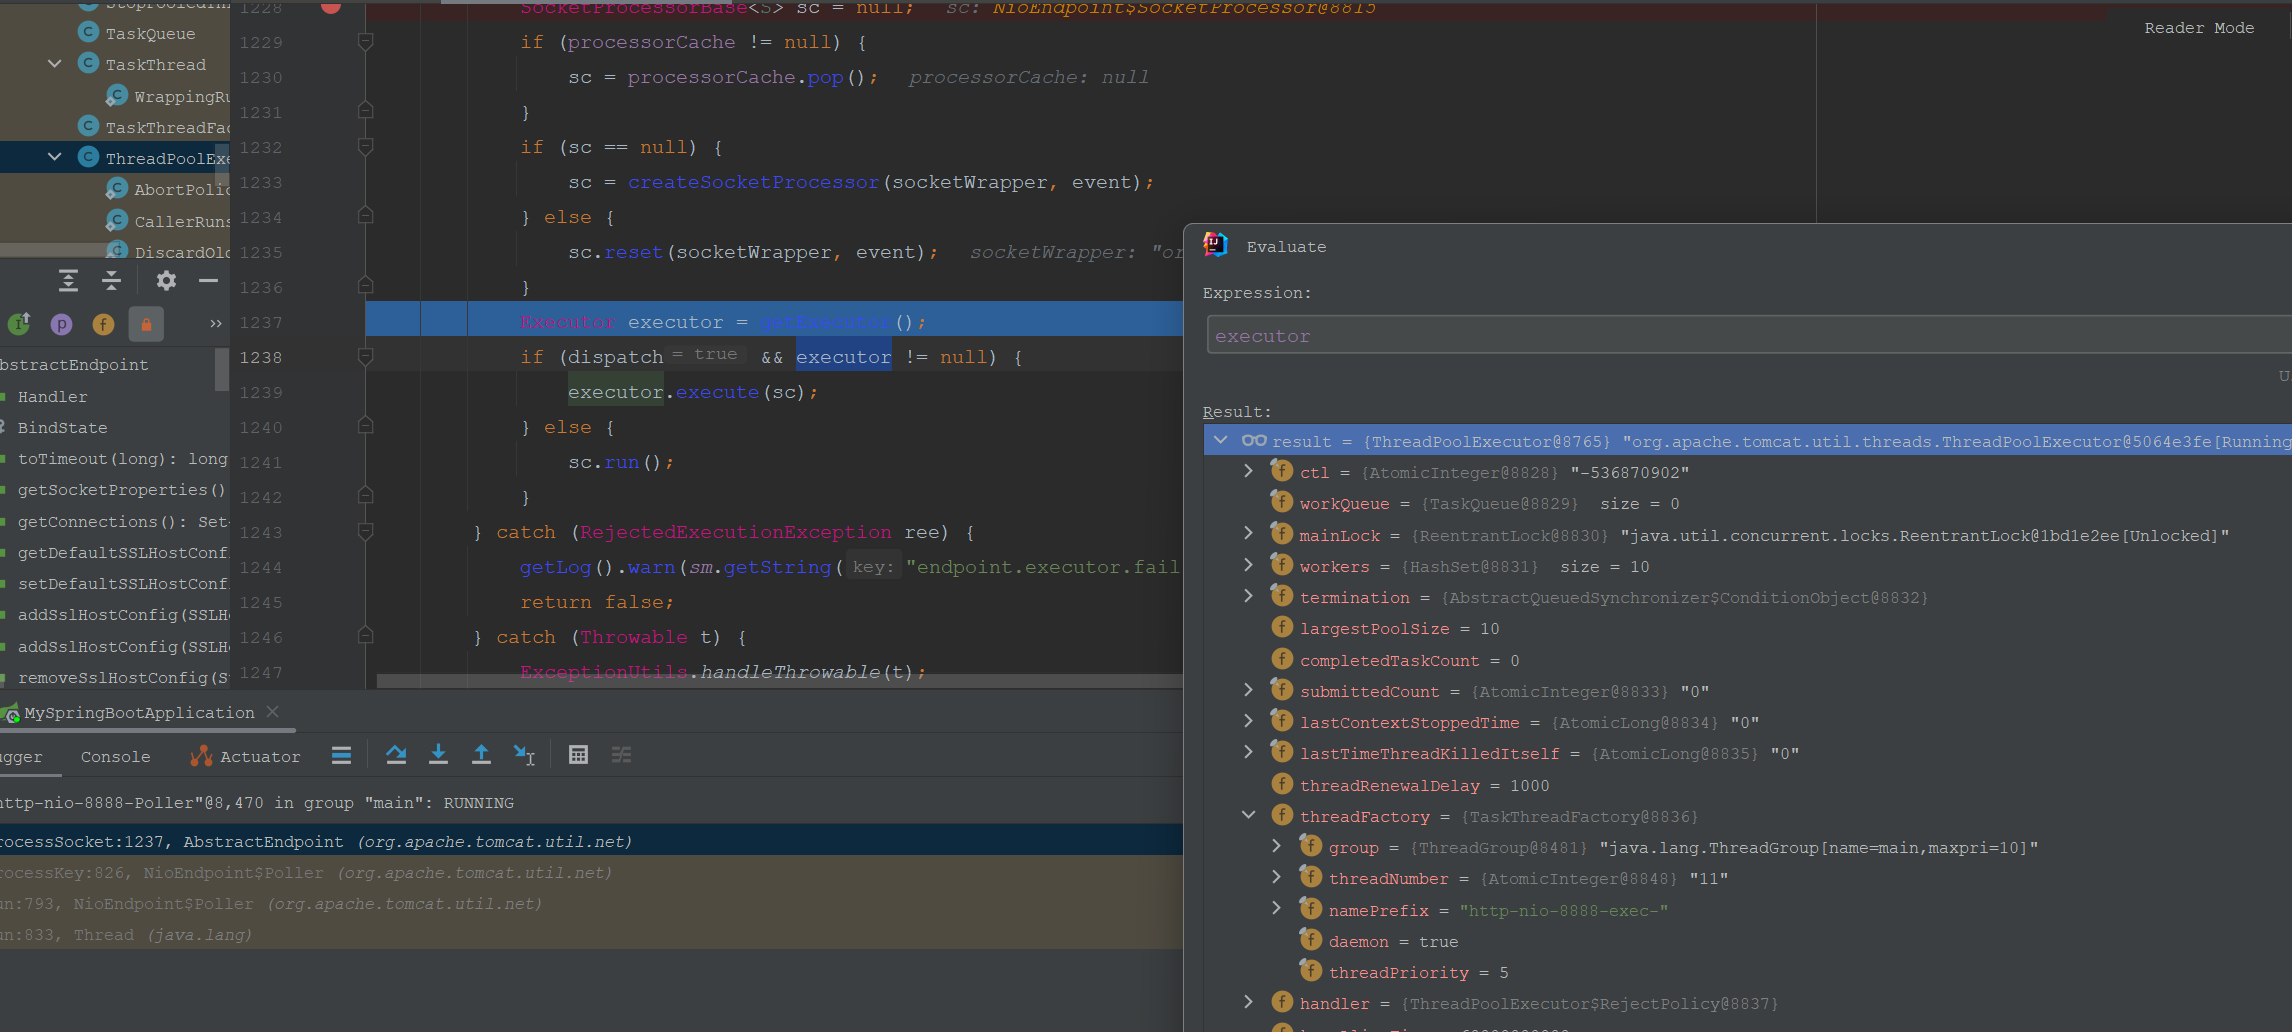
这里的线程池核心线程数量是10,最大线程数量是200,实现类是ThreadPoolExecutor。这里是SpringBoot内嵌的Tomcat的配置的线程池,和单独使用Tomcat的略有不同。 这里提交的task是SocketProcessor,内部封装socketWrapper和event。socketWrapper自己实现runnable,作为Worker线程执行。
2.3 Worker
上面将SocketProcessor提交到线程池之后,线程池开始创建线程执行SocketProcessor。
SocketProcessor的源码之前解读过,这里直接进入doRun()方法。来到这里代码:
  // Process the request from this socket
                    if (event == null) {
                        state = getHandler().process(socketWrapper, SocketEvent.OPEN_READ);
                    } else {
                        state = getHandler().process(socketWrapper, event);
                    }
这里执行ConnectionHandler的process方法,我们进入其方法。里面主要是创建是Processor(协议处理器)和调用Processor的处理方法,核心代码如下:
 if (processor == null) {
                    processor = getProtocol().createProcessor();
                    register(processor);
                    if (getLog().isDebugEnabled()) {
                        getLog().debug(sm.getString("abstractConnectionHandler.processorCreate", processor));
                    }
                }

                processor.setSslSupport(wrapper.getSslSupport());

                SocketState state = SocketState.CLOSED;
                do {
                    state = processor.process(wrapper, status);
追踪信息如下:
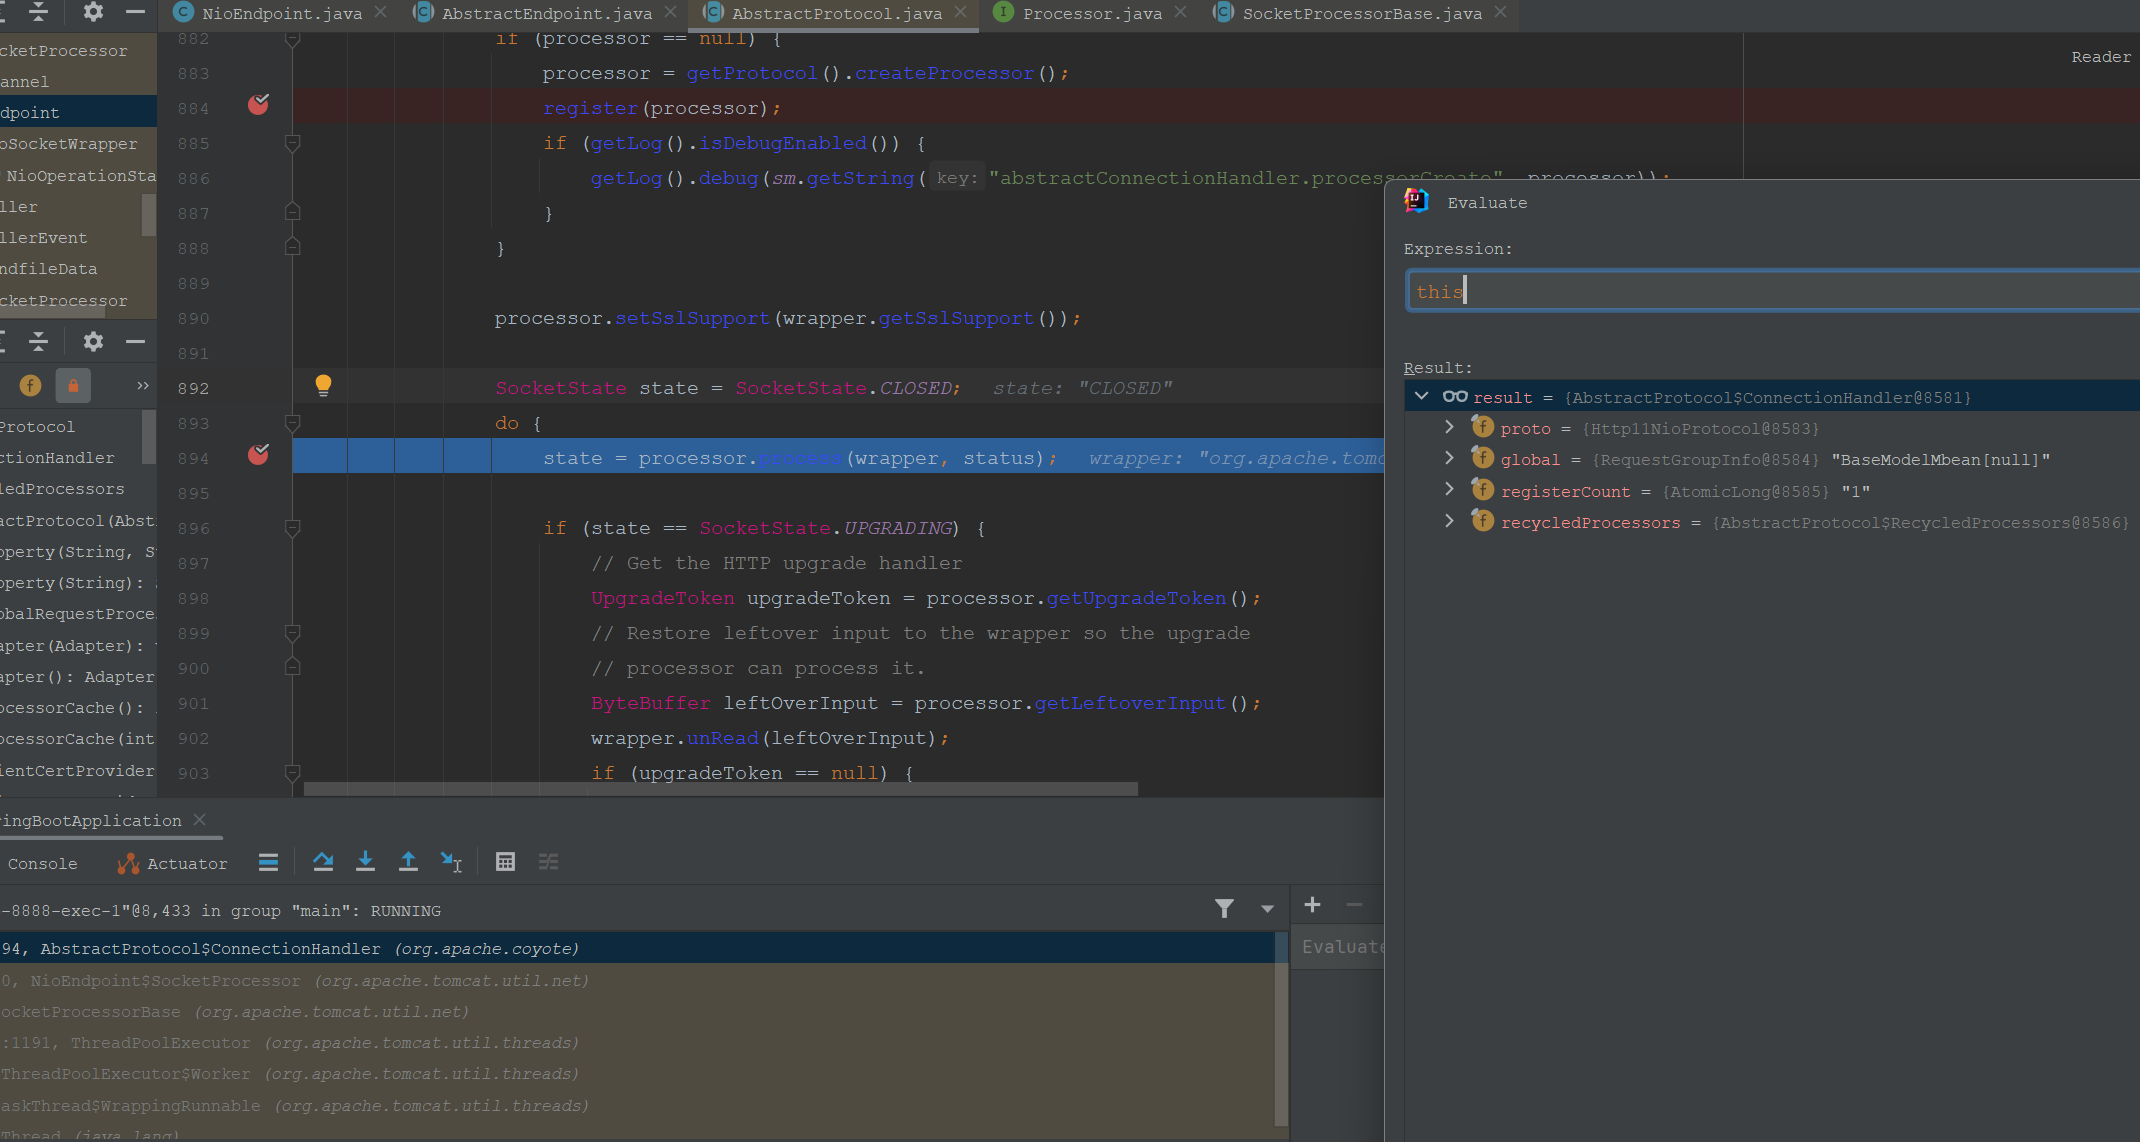
下面则是进入Processor(Http11Processor)的处理方法。
3.协议
AbstractProcessorLight的process方法如下:
else if (isAsync() || isUpgrade() || state == SocketState.ASYNC_END) {
                state = dispatch(status);
                state = checkForPipelinedData(state, socketWrapper);
            } else if (status == SocketEvent.OPEN_WRITE) {
                // Extra write event likely after async, ignore
                state = SocketState.LONG;
            } else if (status == SocketEvent.OPEN_READ) {
                state = service(socketWrapper);
            }
这里由两个主要的分支:dispatch,异步分派方法;service,实际处理请求的方法。
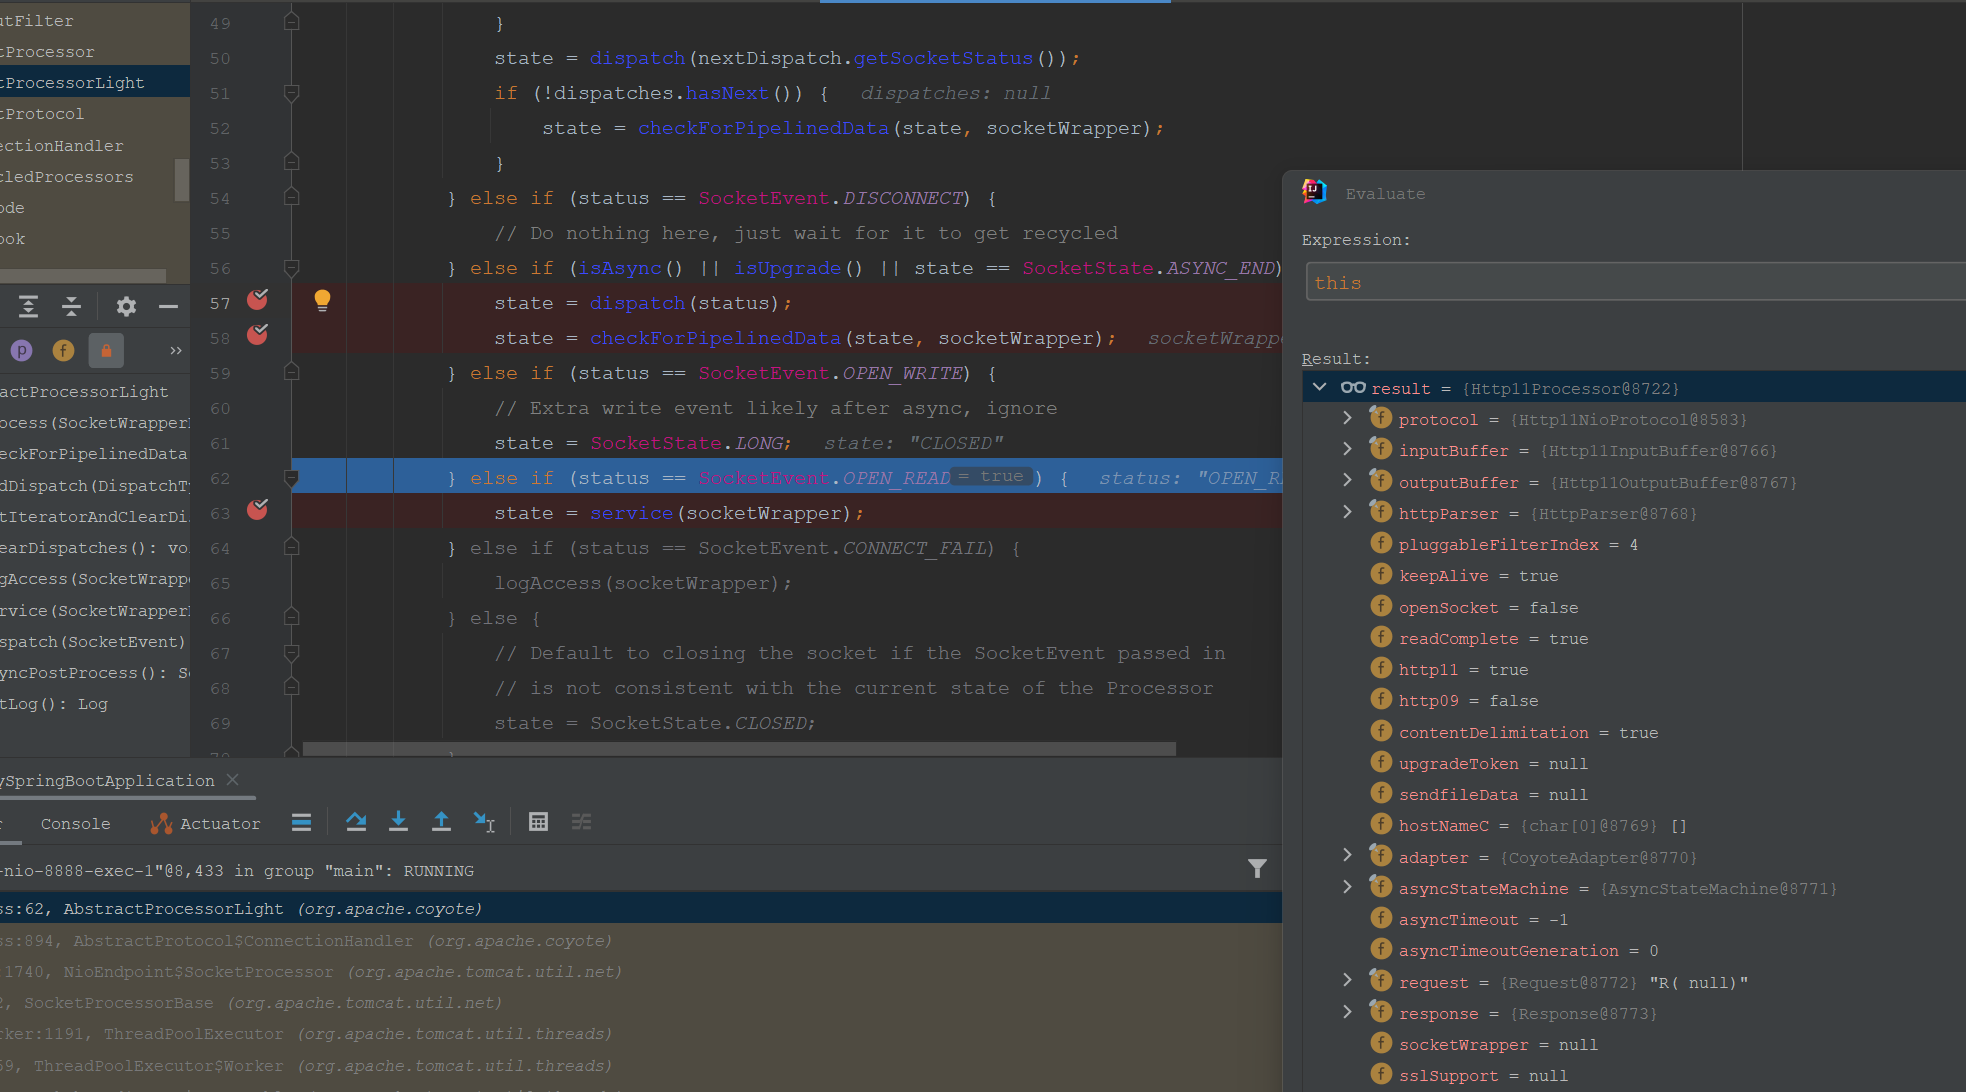
我们继续进入AbstractProcessorLight#service方法来到Http11Processor#service。
Http11Processor的service方法主要是解析header,然后将请求转交给Adapter处理:
   rp.setStage(org.apache.coyote.Constants.STAGE_SERVICE);
                    getAdapter().service(request, response);
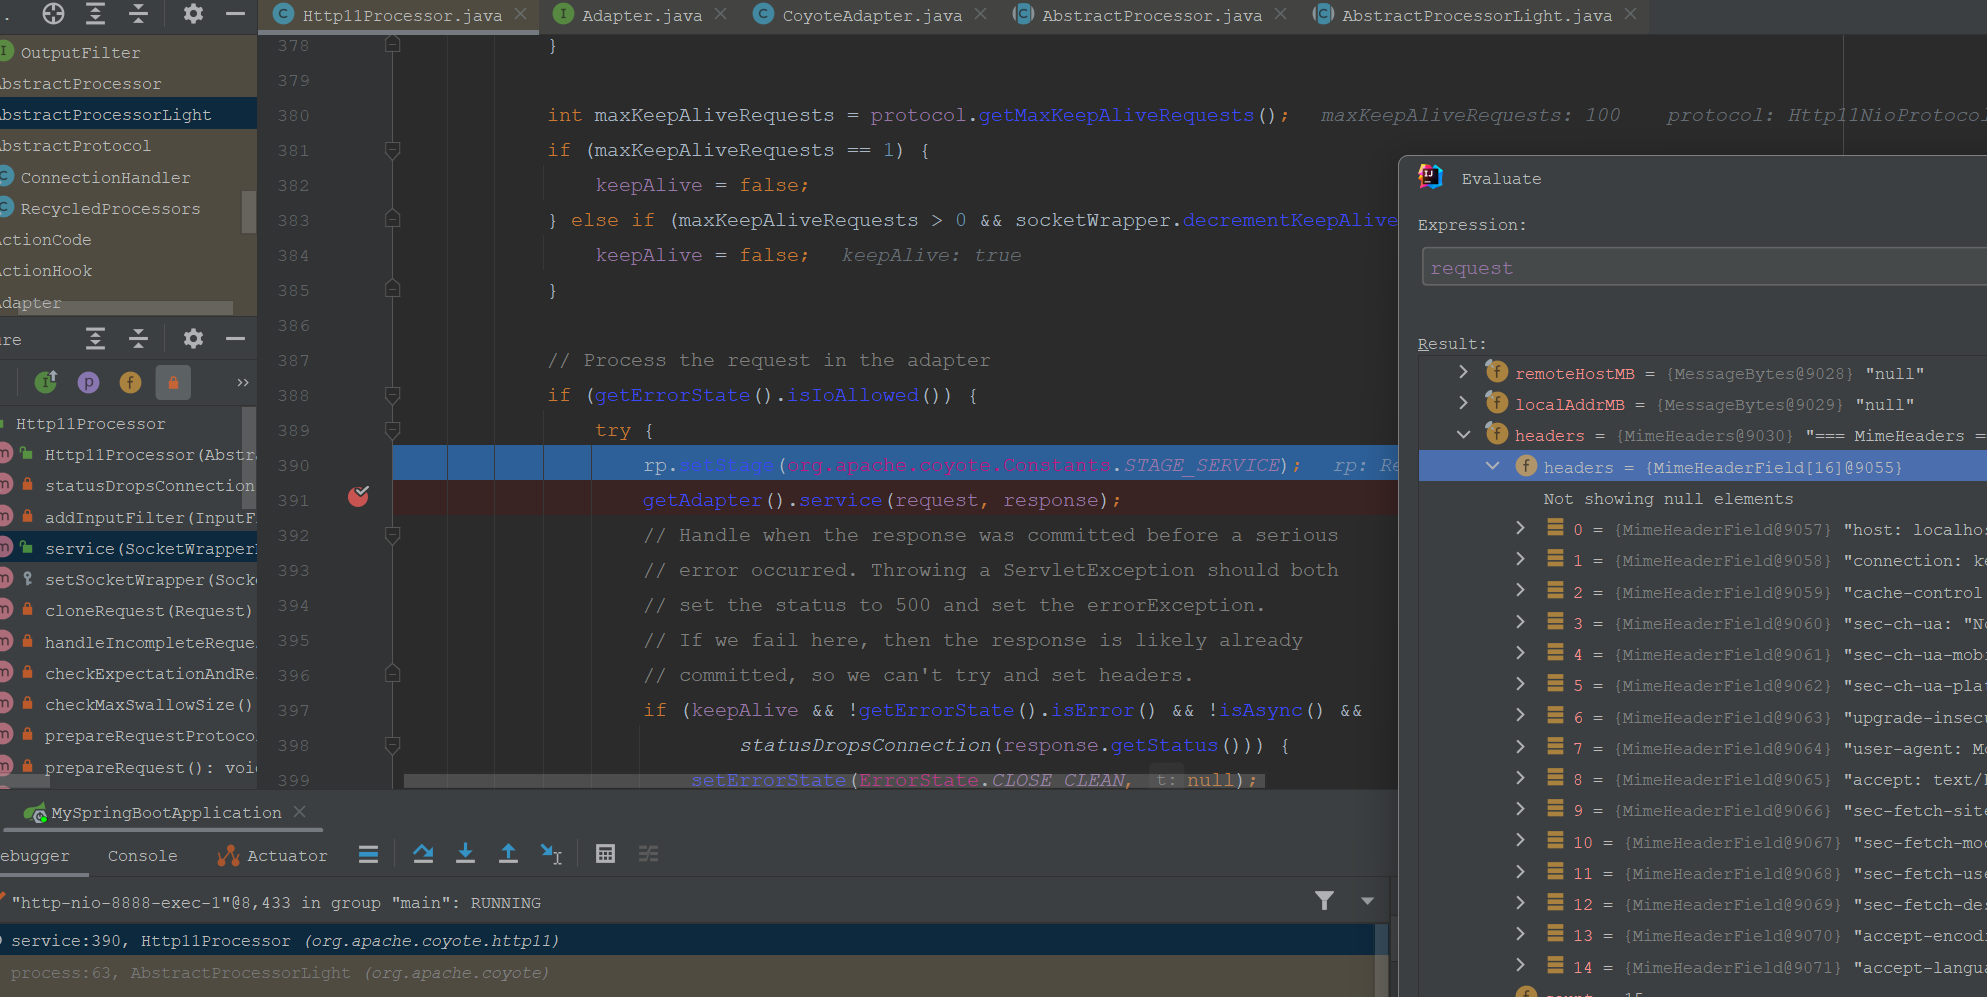
最后请求转交给CoyoteAdapter适配器处理。
4.适配器
我们继续跟踪执行流程来到CoyoteAdapter的service方法。其源码如下:
 @Override
    public void service(org.apache.coyote.Request req, org.apache.coyote.Response res) throws Exception {

        Request request = (Request) req.getNote(ADAPTER_NOTES);
        Response response = (Response) res.getNote(ADAPTER_NOTES);

        if (request == null) {
            // Create objects
            request = connector.createRequest();
            request.setCoyoteRequest(req);
            response = connector.createResponse();
            response.setCoyoteResponse(res);

            // Link objects
            request.setResponse(response);
            response.setRequest(request);

            // Set as notes
            req.setNote(ADAPTER_NOTES, request);
            res.setNote(ADAPTER_NOTES, response);

            // Set query string encoding
            req.getParameters().setQueryStringCharset(connector.getURICharset());
        }

        if (connector.getXpoweredBy()) {
            response.addHeader("X-Powered-By", POWERED_BY);
        }

        boolean async = false;
        boolean postParseSuccess = false;

        req.setRequestThread();

        try {
            // Parse and set Catalina and configuration specific
            // request parameters
            postParseSuccess = postParseRequest(req, request, res, response);
            if (postParseSuccess) {
                // check valves if we support async
                request.setAsyncSupported(connector.getService().getContainer().getPipeline().isAsyncSupported());
                // Calling the container
                connector.getService().getContainer().getPipeline().getFirst().invoke(request, response);
            }
            if (request.isAsync()) {
                async = true;
                ReadListener readListener = req.getReadListener();
                if (readListener != null && request.isFinished()) {
                    // Possible the all data may have been read during service()
                    // method so this needs to be checked here
                    ClassLoader oldCL = null;
                    try {
                        oldCL = request.getContext().bind(false, null);
                        if (req.sendAllDataReadEvent()) {
                            req.getReadListener().onAllDataRead();
                        }
                    } finally {
                        request.getContext().unbind(false, oldCL);
                    }
                }

                Throwable throwable = (Throwable) request.getAttribute(RequestDispatcher.ERROR_EXCEPTION);

                // If an async request was started, is not going to end once
                // this container thread finishes and an error occurred, trigger
                // the async error process
                if (!request.isAsyncCompleting() && throwable != null) {
                    request.getAsyncContextInternal().setErrorState(throwable, true);
                }
            } else {
                request.finishRequest();
                response.finishResponse();
            }

        } catch (IOException e) {
            // Ignore
        } finally {
            AtomicBoolean error = new AtomicBoolean(false);
            res.action(ActionCode.IS_ERROR, error);

            if (request.isAsyncCompleting() && error.get()) {
                // Connection will be forcibly closed which will prevent
                // completion happening at the usual point. Need to trigger
                // call to onComplete() here.
                res.action(ActionCode.ASYNC_POST_PROCESS, null);
                async = false;
            }

            // Access log
            if (!async && postParseSuccess) {
                // Log only if processing was invoked.
                // If postParseRequest() failed, it has already logged it.
                Context context = request.getContext();
                Host host = request.getHost();
                // If the context is null, it is likely that the endpoint was
                // shutdown, this connection closed and the request recycled in
                // a different thread. That thread will have updated the access
                // log so it is OK not to update the access log here in that
                // case.
                // The other possibility is that an error occurred early in
                // processing and the request could not be mapped to a Context.
                // Log via the host or engine in that case.
                long time = System.nanoTime() - req.getStartTimeNanos();
                if (context != null) {
                    context.logAccess(request, response, time, false);
                } else if (response.isError()) {
                    if (host != null) {
                        host.logAccess(request, response, time, false);
                    } else {
                        connector.getService().getContainer().logAccess(request, response, time, false);
                    }
                }
            }

            req.getRequestProcessor().setWorkerThreadName(null);
            req.clearRequestThread();

            // Recycle the wrapper request and response
            if (!async) {
                updateWrapperErrorCount(request, response);
                request.recycle();
                response.recycle();
            }
        }
    }
其内部主要功能就是解析请求,创建Request和Response,以及将request和response交给容器处理。
// Calling the container
                connector.getService().getContainer().getPipeline().getFirst().invoke(request, response);
容器自己是没有service或者invoke方法的,由其Valve-阀来执行具体的请求。Valve有一个基础阀,作为容器阀执行链的最后一个阀,如StandardEngineValve。
接下来的请求就是交给容器和Servlet处理了。
5.参考材料
1.《深入剖析Tomcat》