
本文是Spring源码阅读计划的第十一篇文章,本文介绍Cglib动态代理创建的AOP对象的过程。
上一篇文章介绍AopProxy有JdkDynamicAopProxy、ObjenesisCglibAopProxy(CglibAopProxy的子类)两个,是创建代理对象的委派类。
AopProxy.getProxy就是使用Jdk动态代理或者Cglib动态代理生成实际的代理对象的方法。本文介绍CglibAopProxy创建代理对象的过程。
如何选择JdkDynamicAopProxy还是CglibAopProxy?看下这个注解@EnableAspectJAutoProxy。
@Target(ElementType.TYPE)
@Retention(RetentionPolicy.RUNTIME)
@Documented
@Import(AspectJAutoProxyRegistrar.class)
public @interface EnableAspectJAutoProxy {

	/**
	 * Indicate whether subclass-based (CGLIB) proxies are to be created as opposed
	 * to standard Java interface-based proxies. The default is {@code false}.
     * 如果设置proxy-target-class则使用cglib代理而不是jdk动态代理,jdk动态代理只能代理接口
	 */
	boolean proxyTargetClass() default false;

	/**
	 * Indicate that the proxy should be exposed by the AOP framework as a {@code ThreadLocal}
	 * for retrieval via the {@link org.springframework.aop.framework.AopContext} class.
	 * Off by default, i.e. no guarantees that {@code AopContext} access will work.
	 * @since 4.3.1
	 */
	boolean exposeProxy() default false;

}
本文源码地址为:https://github.com/zouhuanli/SpringMvcDemo.git.
cglib是一个基于ASM字节码操纵工具的代码生成库,我们先看看单独使用cglib的示例。
一、Cglib的简单使用
服务接口:
package com.homura.aopproxy.cglib;

public interface TestService {
    void test();
}
服务接口实现类:
package com.homura.aopproxy.cglib;

import org.slf4j.Logger;

public class TestServiceImpl implements TestService {
    private static final Logger LOGGER = org.slf4j.LoggerFactory.getLogger(TestServiceImpl.class);

    @Override
    public void test() {
        LOGGER.info("test");
    }
}
代理对象:
package com.homura.aopproxy.cglib;

import org.slf4j.Logger;
import org.springframework.cglib.proxy.Enhancer;
import org.springframework.cglib.proxy.MethodInterceptor;
import org.springframework.cglib.proxy.MethodProxy;

import java.lang.reflect.Method;

public class TestProxy implements MethodInterceptor {
    private static final Logger LOGGER = org.slf4j.LoggerFactory.getLogger(TestProxy.class);
    /**
     * 目标对象
     */
    private Object target;

    public Object newProxyInstance(Object target) {
        this.target = target;
        Enhancer enhancer = new Enhancer();
        // 设置父类为实例类
        enhancer.setSuperclass(this.target.getClass());
        enhancer.setCallback(this);
        // 创建代理对象
        return enhancer.create();
    }

    /**
     * All generated proxied methods call this method instead of the original method.
     * The original method may either be invoked by normal reflection using the Method object,
     * or by using the MethodProxy (faster).
     *
     * @param obj    "this", the enhanced object
     * @param method intercepted Method
     * @param args   argument array; primitive types are wrapped
     * @param proxy  used to invoke super (non-intercepted method); may be called
     *               as many times as needed
     * @return any value compatible with the signature of the proxied method. Method returning void will ignore this value.
     * @throws Throwable any exception may be thrown; if so, super method will not be invoked
     * @see proxy
     */
    @Override
    public Object intercept(Object obj, Method method, Object[] args, MethodProxy proxy) throws Throwable {
        if (!method.getName().contains("test")) {
            return proxy.invokeSuper(obj, args);
        }
        LOGGER.info("调用前:[{}]-[{}]", obj, method);
        Object result = proxy.invokeSuper(obj, args);
        LOGGER.info("调用后:[{}]-[{}]", obj, method);
        return result;
    }


}
测试启动类:
package com.homura.aopproxy.cglib;

public class TestStarter {
    public static void main(String[] args) {
        TestProxy testProxy = new TestProxy();
        TestService testService = (TestService) testProxy.newProxyInstance(new TestServiceImpl());
        testService.test();
    }
}
这里有个注意的点就是如果直接使用cglib官方的包,因为最新的版本是3.3.0,发布时间是”Aug 12, 2019”,在高版本的JDK会报错”“module java.base does not “opens java.lang“ to unnamed module”这样的错误,这是JDK9之后模块化对反射调用的限制。为了方便演示,笔者这里直接使用Spring官方 的Cglib代码包。 测试结果如下:
2023-10-09 21:34:37,777|INFO |          TestProxy.java:46  |main|调用前:[com.homura.aopproxy.cglib.TestServiceImpl$$EnhancerByCGLIB$$6970f69e@44be0077]-[public void com.homura.aopproxy.cglib.TestServiceImpl.test()]
2023-10-09 21:34:37,790|INFO |    TestServiceImpl.java:10  |main|test
2023-10-09 21:34:37,790|INFO |          TestProxy.java:48  |main|调用后:[com.homura.aopproxy.cglib.TestServiceImpl$$EnhancerByCGLIB$$6970f69e@44be0077]-[public void com.homura.aopproxy.cglib.TestServiceImpl.test()]
可以看到在代码层面基本的操作就是创建增强器,设置回调方法,实现拦截方法intercept增加增强操作。 我们再继续阅读Spring使用Cglib创建代理对象的源码。
二、CglibAopProxy的创建代理对象过程
进入CglibAopProxy的buildProxy方法:
private Object buildProxy(@Nullable ClassLoader classLoader, boolean classOnly) {
                    //获得目标对象的类型
			Class<?> rootClass = this.advised.getTargetClass();
			Assert.state(rootClass != null, "Target class must be available for creating a CGLIB proxy");

			Class<?> proxySuperClass = rootClass;
			if (rootClass.getName().contains(ClassUtils.CGLIB_CLASS_SEPARATOR)) {
				proxySuperClass = rootClass.getSuperclass();
				Class<?>[] additionalInterfaces = rootClass.getInterfaces();
				for (Class<?> additionalInterface : additionalInterfaces) {
					this.advised.addInterface(additionalInterface);
				}
			}


                    //创建增强器
			// Configure CGLIB Enhancer...
			Enhancer enhancer = createEnhancer();
			if (classLoader != null) {
				enhancer.setClassLoader(classLoader);
				if (classLoader instanceof SmartClassLoader smartClassLoader &&
						smartClassLoader.isClassReloadable(proxySuperClass)) {
					enhancer.setUseCache(false);
				}
			}
                    //设置目标对象的类型
			enhancer.setSuperclass(proxySuperClass);
			enhancer.setInterfaces(AopProxyUtils.completeProxiedInterfaces(this.advised));
			enhancer.setNamingPolicy(SpringNamingPolicy.INSTANCE);
			enhancer.setAttemptLoad(true);
			enhancer.setStrategy(new ClassLoaderAwareGeneratorStrategy(classLoader));
            //回调列表
			Callback[] callbacks = getCallbacks(rootClass);
			Class<?>[] types = new Class<?>[callbacks.length];
			for (int x = 0; x < types.length; x++) {
				types[x] = callbacks[x].getClass();
			}
			// fixedInterceptorMap only populated at this point, after getCallbacks call above
			ProxyCallbackFilter filter = new ProxyCallbackFilter(
					this.advised.getConfigurationOnlyCopy(), this.fixedInterceptorMap, this.fixedInterceptorOffset);
			enhancer.setCallbackFilter(filter);
			enhancer.setCallbackTypes(types);

			// Generate the proxy class and create a proxy instance.
			// ProxyCallbackFilter has method introspection capability with Advisor access.

			return (classOnly ? createProxyClass(enhancer) : createProxyClassAndInstance(enhancer, callbacks));

	}
回调列表如下:
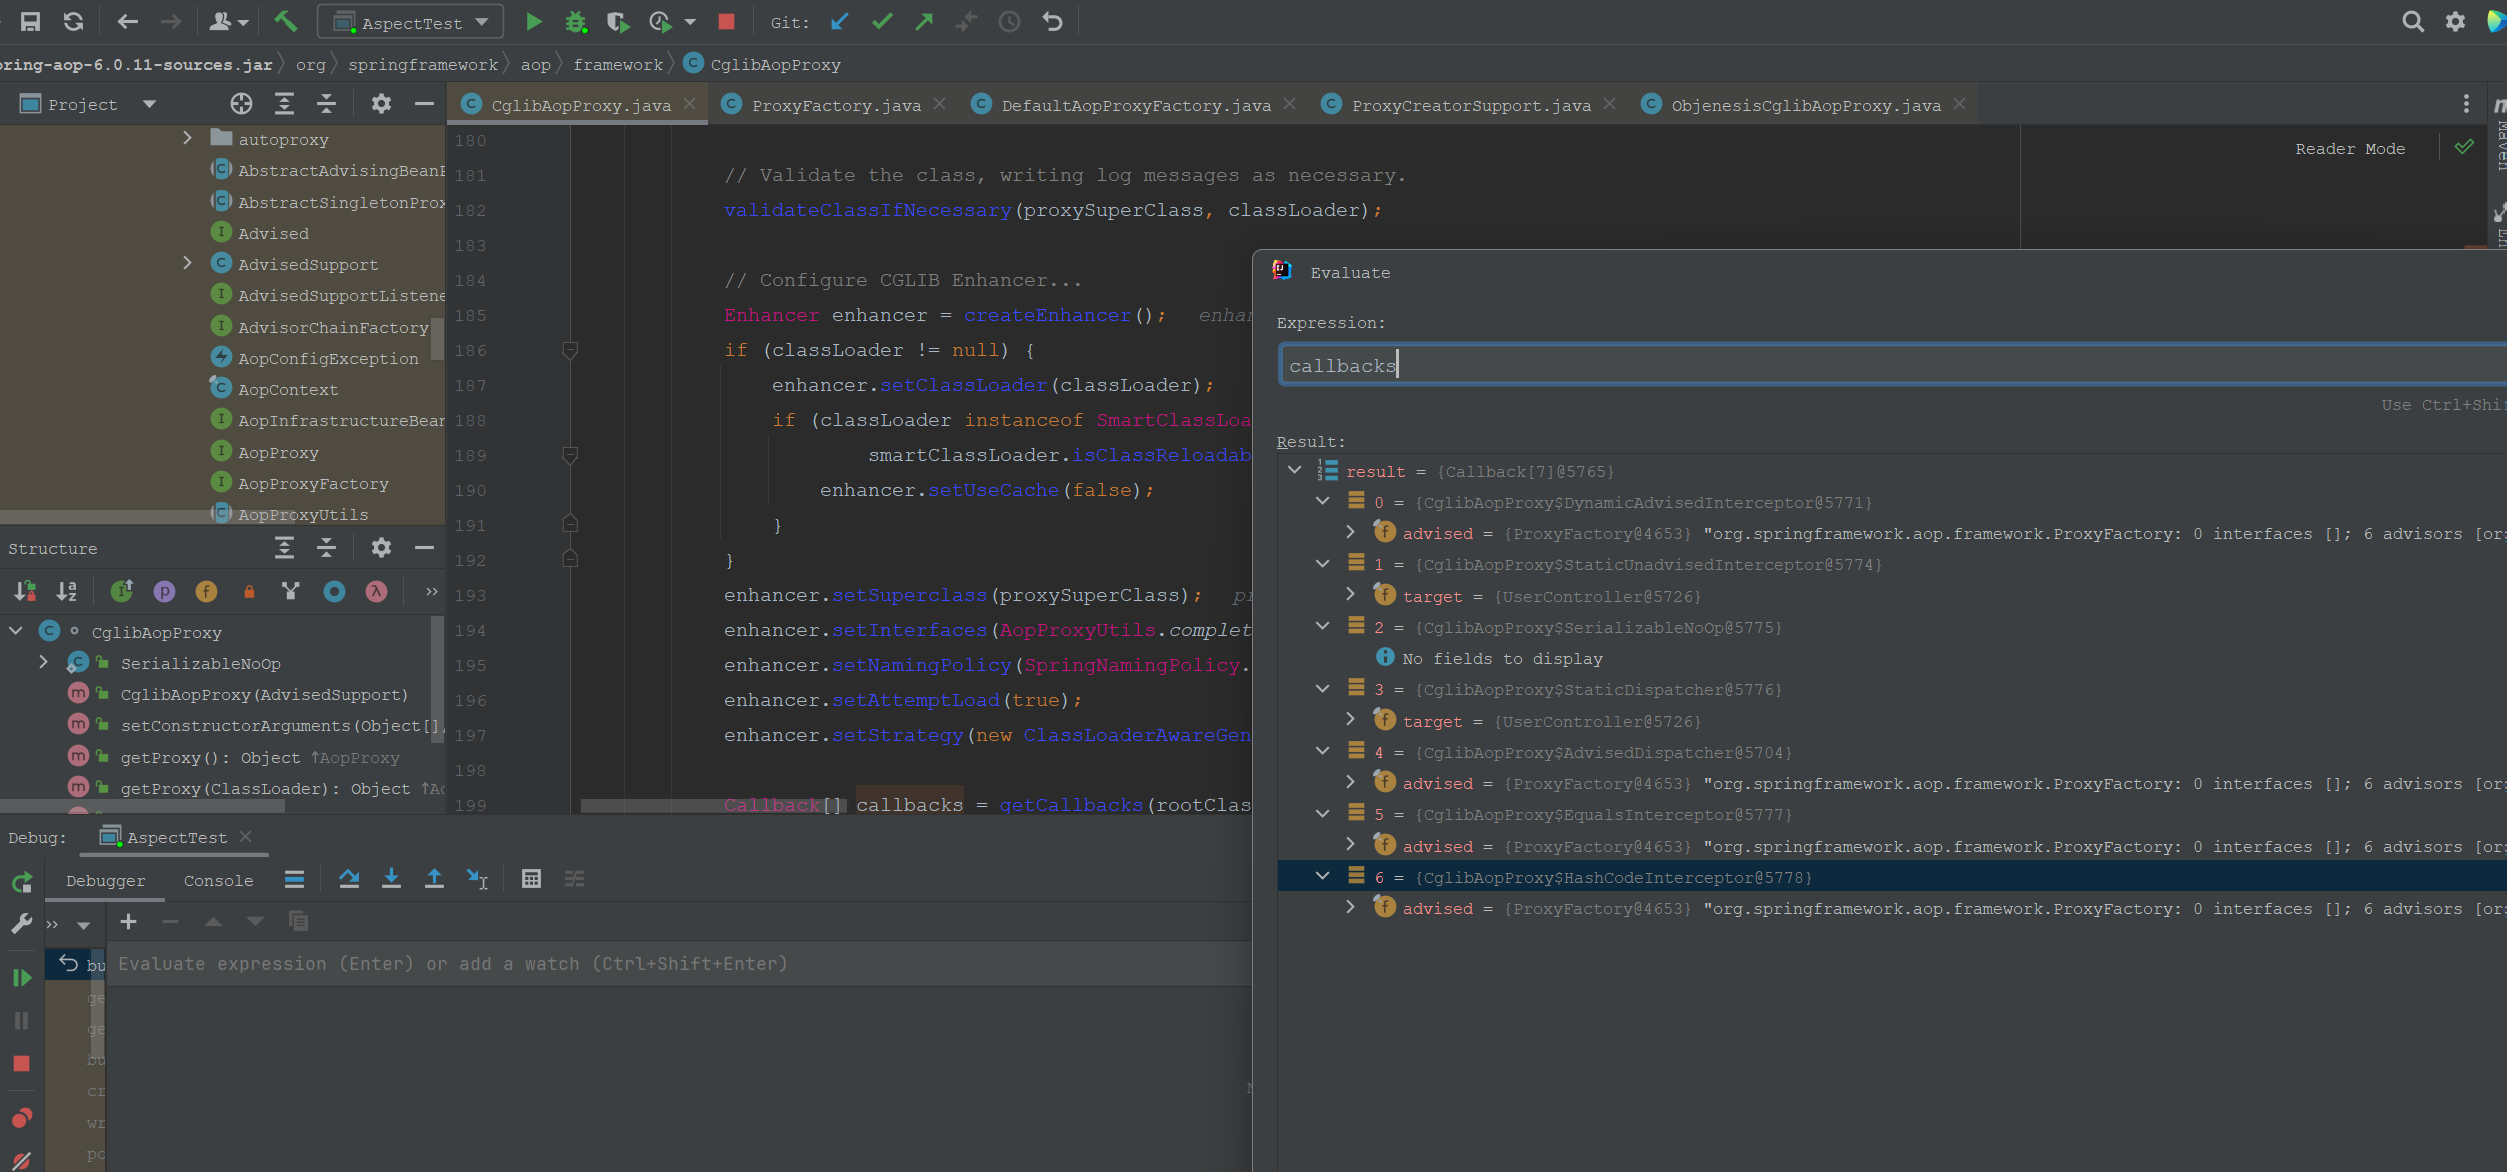
继续进入createProxyClassAndInstance方法。
protected Object createProxyClassAndInstance(Enhancer enhancer, Callback[] callbacks) {
		enhancer.setInterceptDuringConstruction(false);
		enhancer.setCallbacks(callbacks);
		return (this.constructorArgs != null && this.constructorArgTypes != null ?
				enhancer.create(this.constructorArgTypes, this.constructorArgs) :
                //创建代理对象
				enhancer.create());
	}
三、参考材料
1.Spring源码(版本6.0.11)
2.《spring源码深度解析》(郝佳)
3.《Spring Framework Documentation》(Version 6.0.8)